Chatbot Setup
Chatbots help make customer communication faster, easier, and more personalized. In WappCloud, you can create chatbots without coding using a simple drag-and-drop builder.
Steps to Create a Chatbot
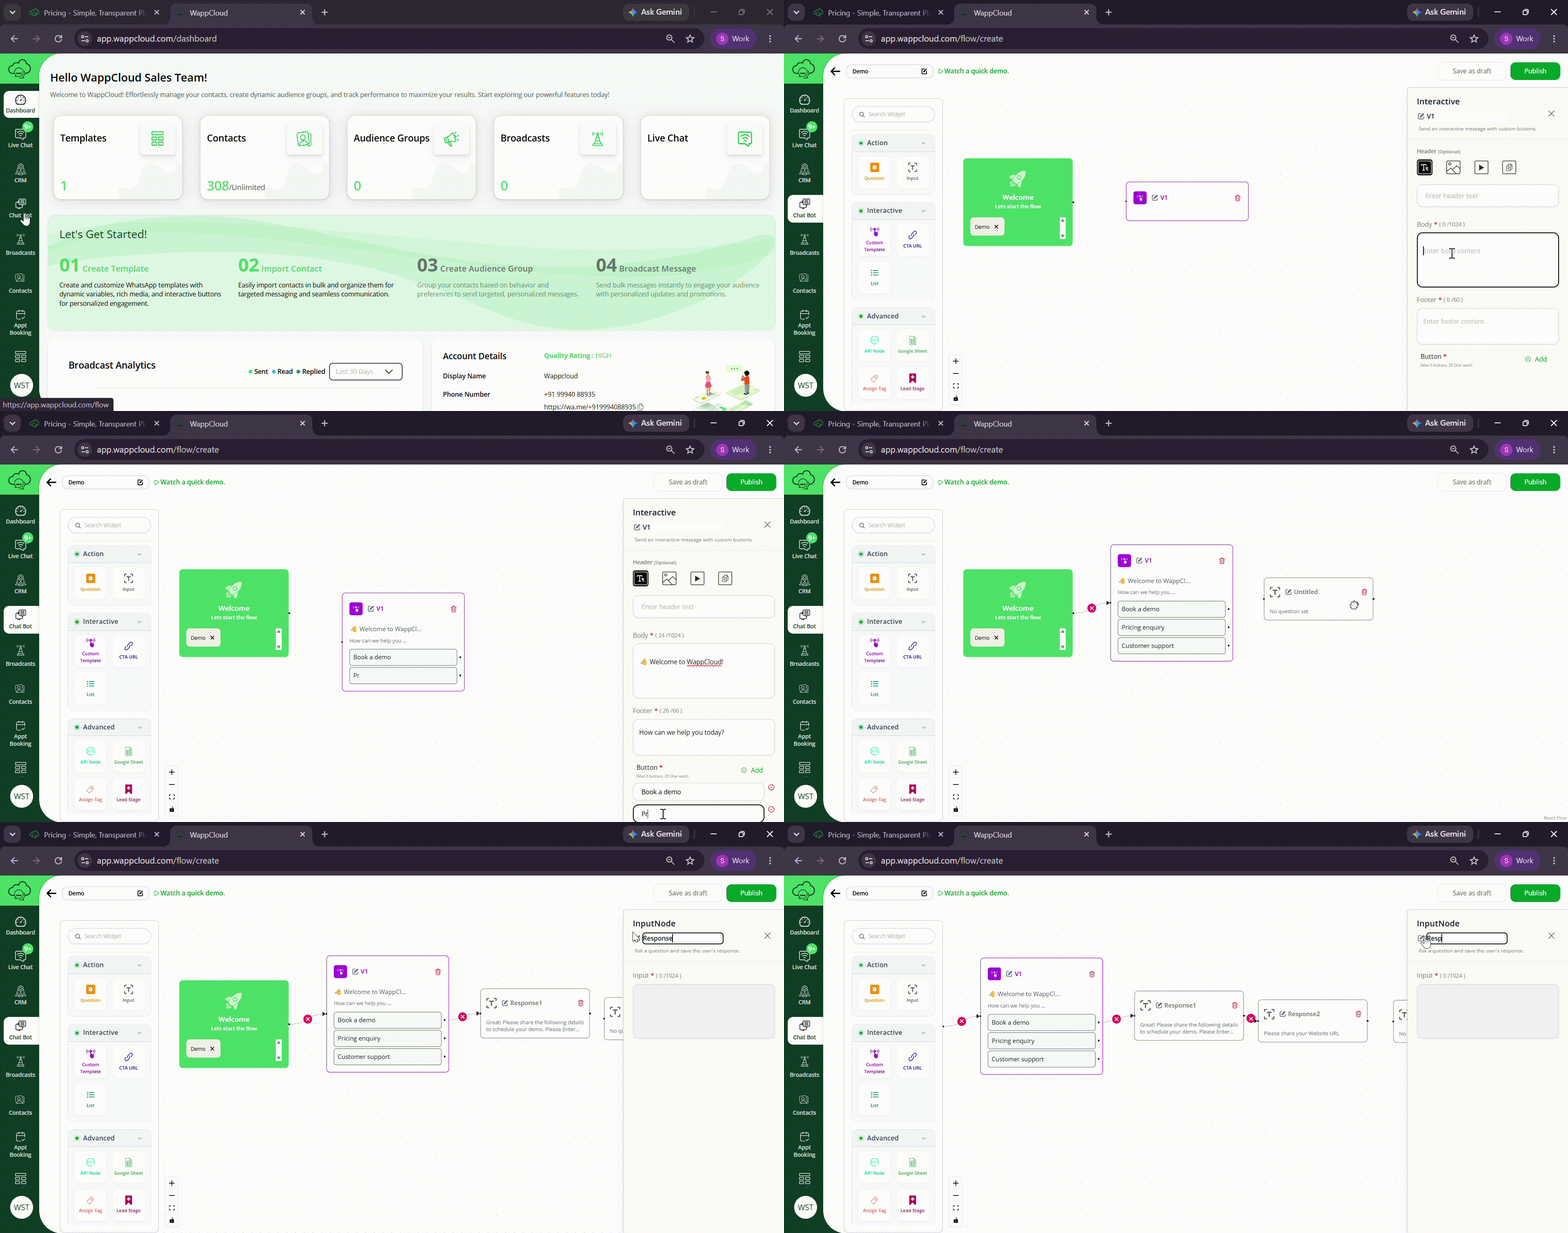
-
Click on Chatbot from the dashboard menu.
-
Click Create New Chatbot.
-
Enter a title for your chatbot.
-
Add a trigger word (Example: Hi, Hello).
-
Design your chatbot flow using widgets based on your requirement. The widget panel groups nodes into five categories — Trigger, Action, Interactive, Advanced, and Message. Available widgets include:
- Trigger: Keyword Node, Ad Welcome Sequence Node, Webhook Node, New Contact Node, New Message Node, Lead Stage Changed Node, Attribute Changed Node
- Action: Question Node, Input Node
- Interactive: Custom Template (Interactive Button) Node, CTA URL Node, List Node
- Advanced: API Node, Google Sheet Node, Assign Tag Node, Lead Stage Node, Round Robin Node, Condition Node, Set/Remove Attribute Node, Time Delay Node
- Message: Text, Image, Video, Audio, and Document Message Nodes, and the Template Node (including Carousel templates)
See Chatbot Nodes for a full description of every widget.
-
Connect the widgets to create your chatbot flow. Start from the first node and connect it to the message widget.
-
After completing the chatbot flow, click Publish to save and activate it.