WooCommerce Integration
Connect your WooCommerce store to WappCloud to automatically send WhatsApp notifications to customers as their order status changes — no manual sending required. WappCloud reads the order details coming from WooCommerce and fills them into your chosen WhatsApp template.
Step 1: Connect Your WooCommerce Store
Go to Integration > WooCommerce from the left-hand menu.
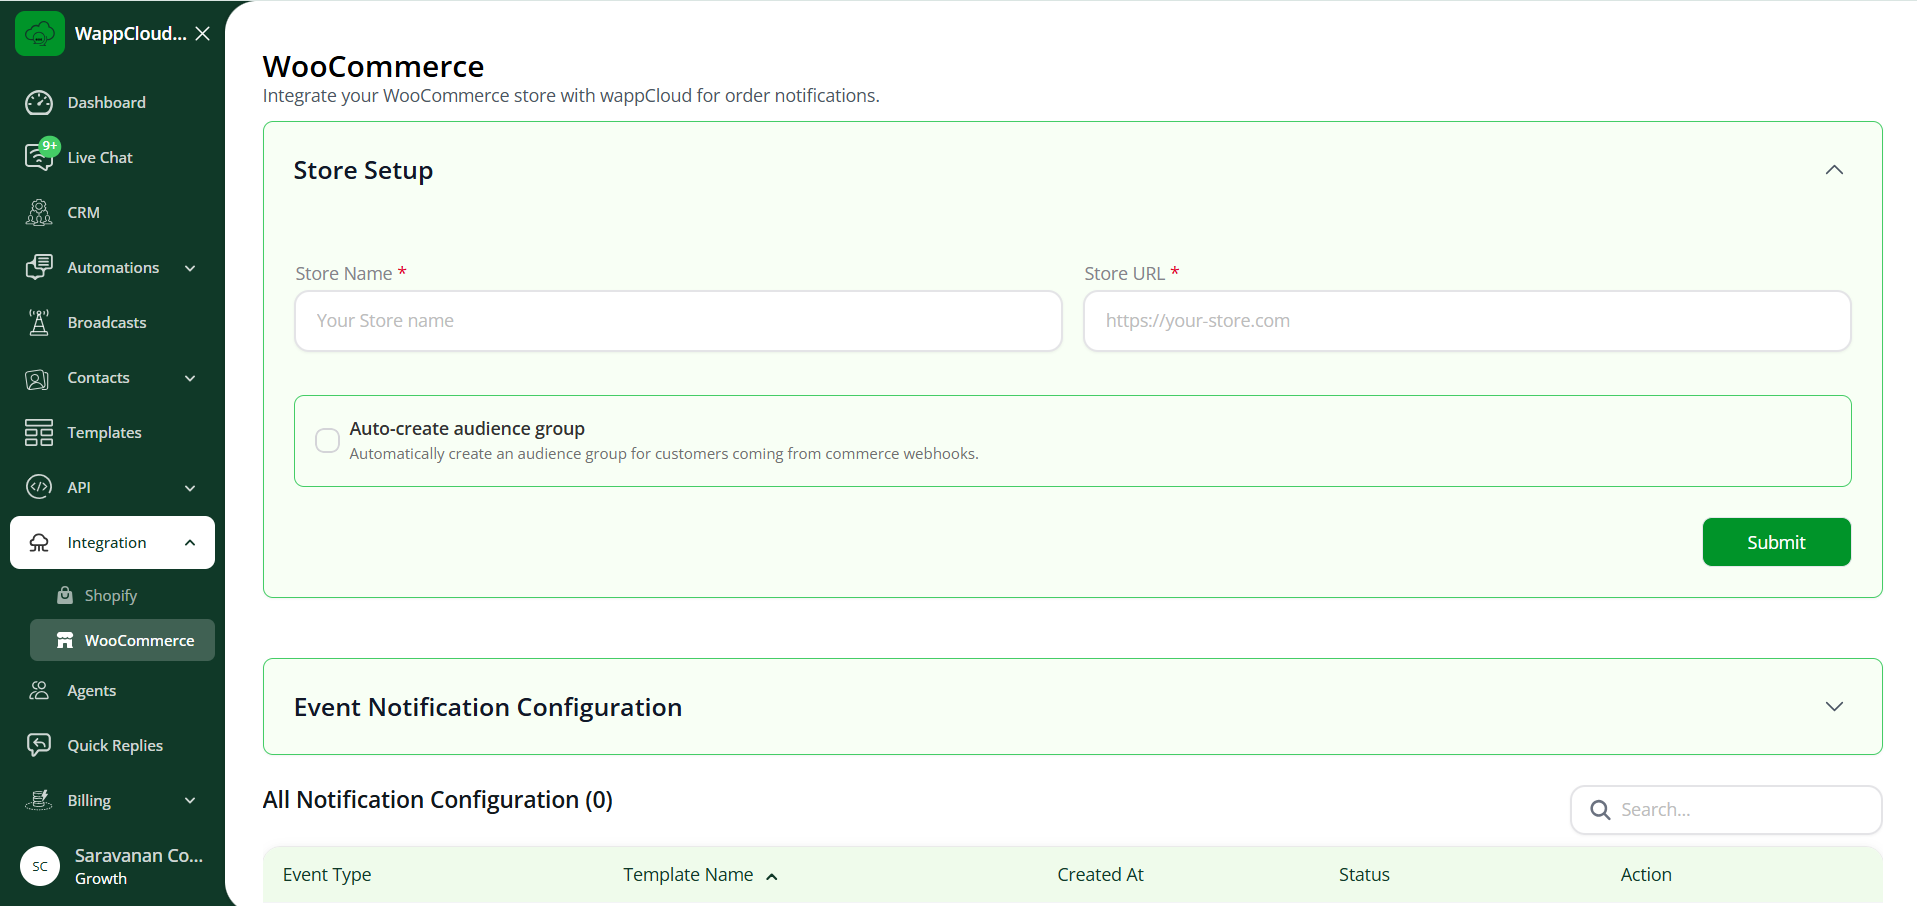
- Store Name – Enter a name to identify this store inside WappCloud.
- Store URL – Enter your store’s website address, e.g.
https://your-store.com. - Auto-create audience group – Turn this on if you’d like customers from this store’s orders to be automatically grouped into a contact/audience group for later broadcasts.
- Click Submit to save.
Once saved, expand Event Notification Configuration below to set up your notification rules.
Step 2: Choose a Topic and Event Type
WooCommerce notifications are set up in two parts — Select Topic and Event Type.
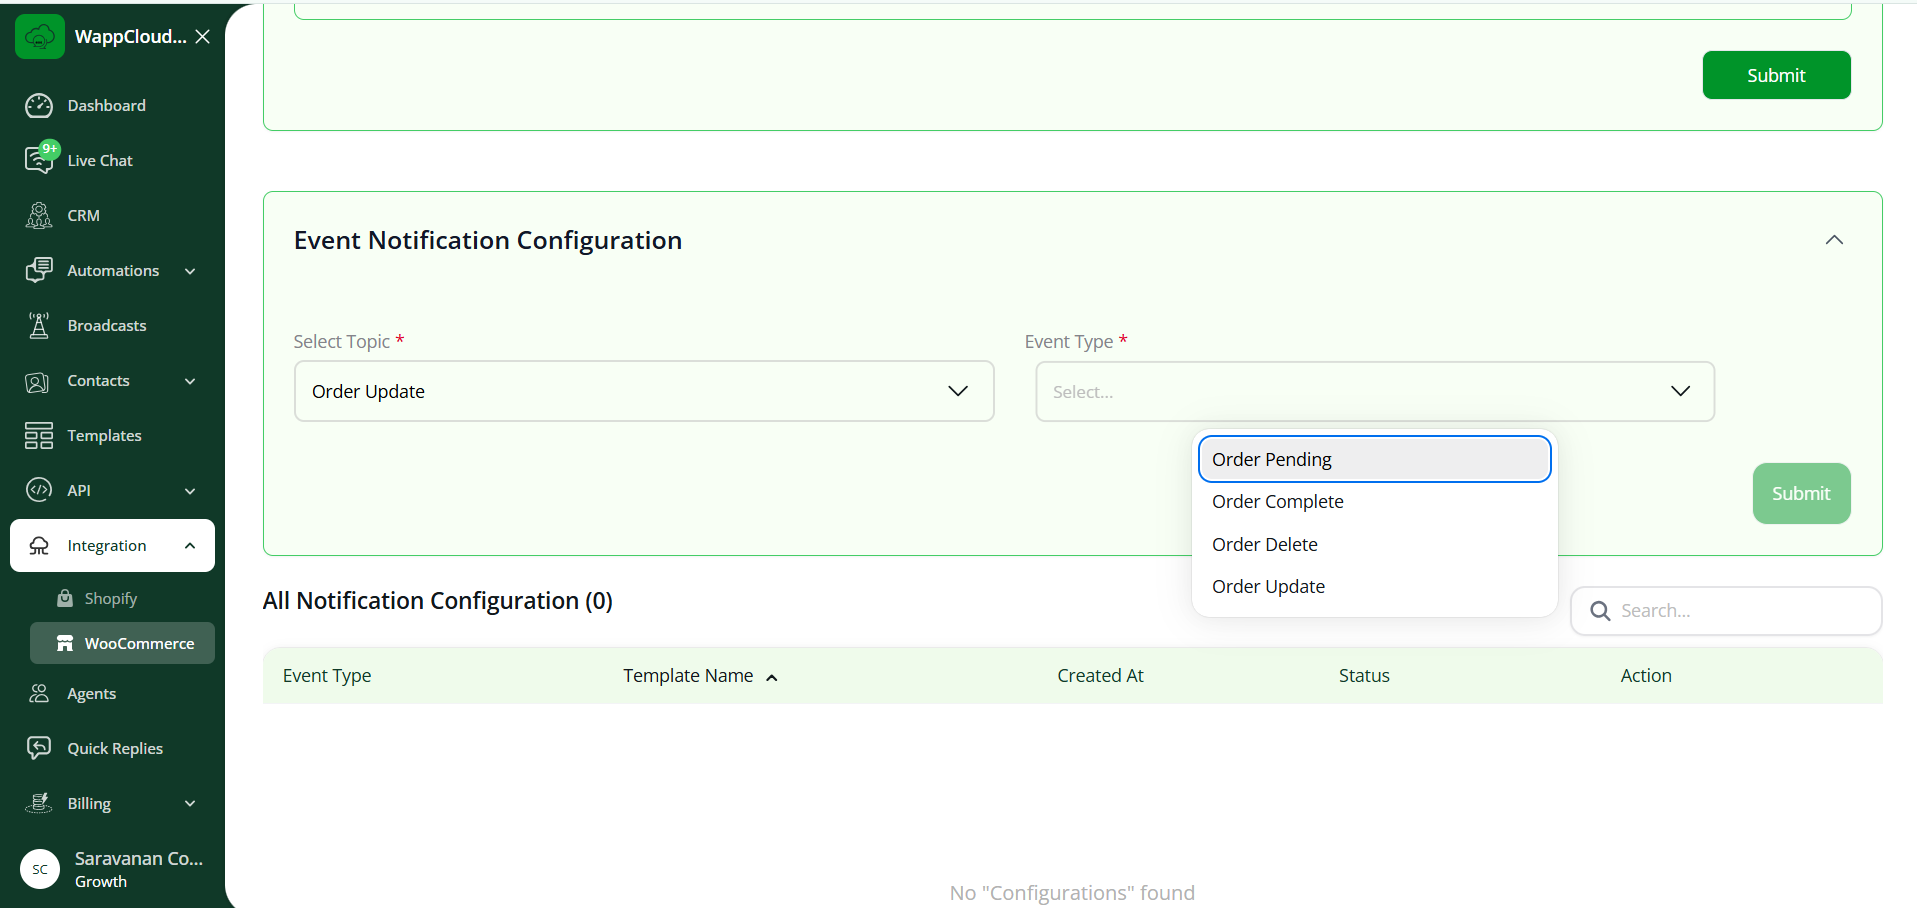
Select Topic — what kind of change on the order you want to react to:
| Topic | Meaning |
|---|---|
| Order Create | Triggers when a brand-new order is placed. |
| Order Update | Triggers when an existing order changes in any way. |
Event Type — the specific order status to watch for (mainly used alongside Order Update):
| Event Type | Meaning |
|---|---|
| Order Pending | The order has been placed but payment/processing hasn’t been confirmed yet. |
| Order Processing (Order Complete family) | The order is confirmed and being prepared. |
| Order Complete | The order has been fully processed and completed. |
| Order Delete | The order has been cancelled/removed. |
| Order Update | A general update happened on the order. |
Pick the combination that matches the moment you want to notify the customer — for example, Order Update → Order Complete to tell customers their order is done.
Step 3: Pick a Template and Map the Dynamic Fields
Select the WhatsApp template to use for this event, then map each placeholder ({{1}}, {{2}}, …) in the template body to a piece of order information.
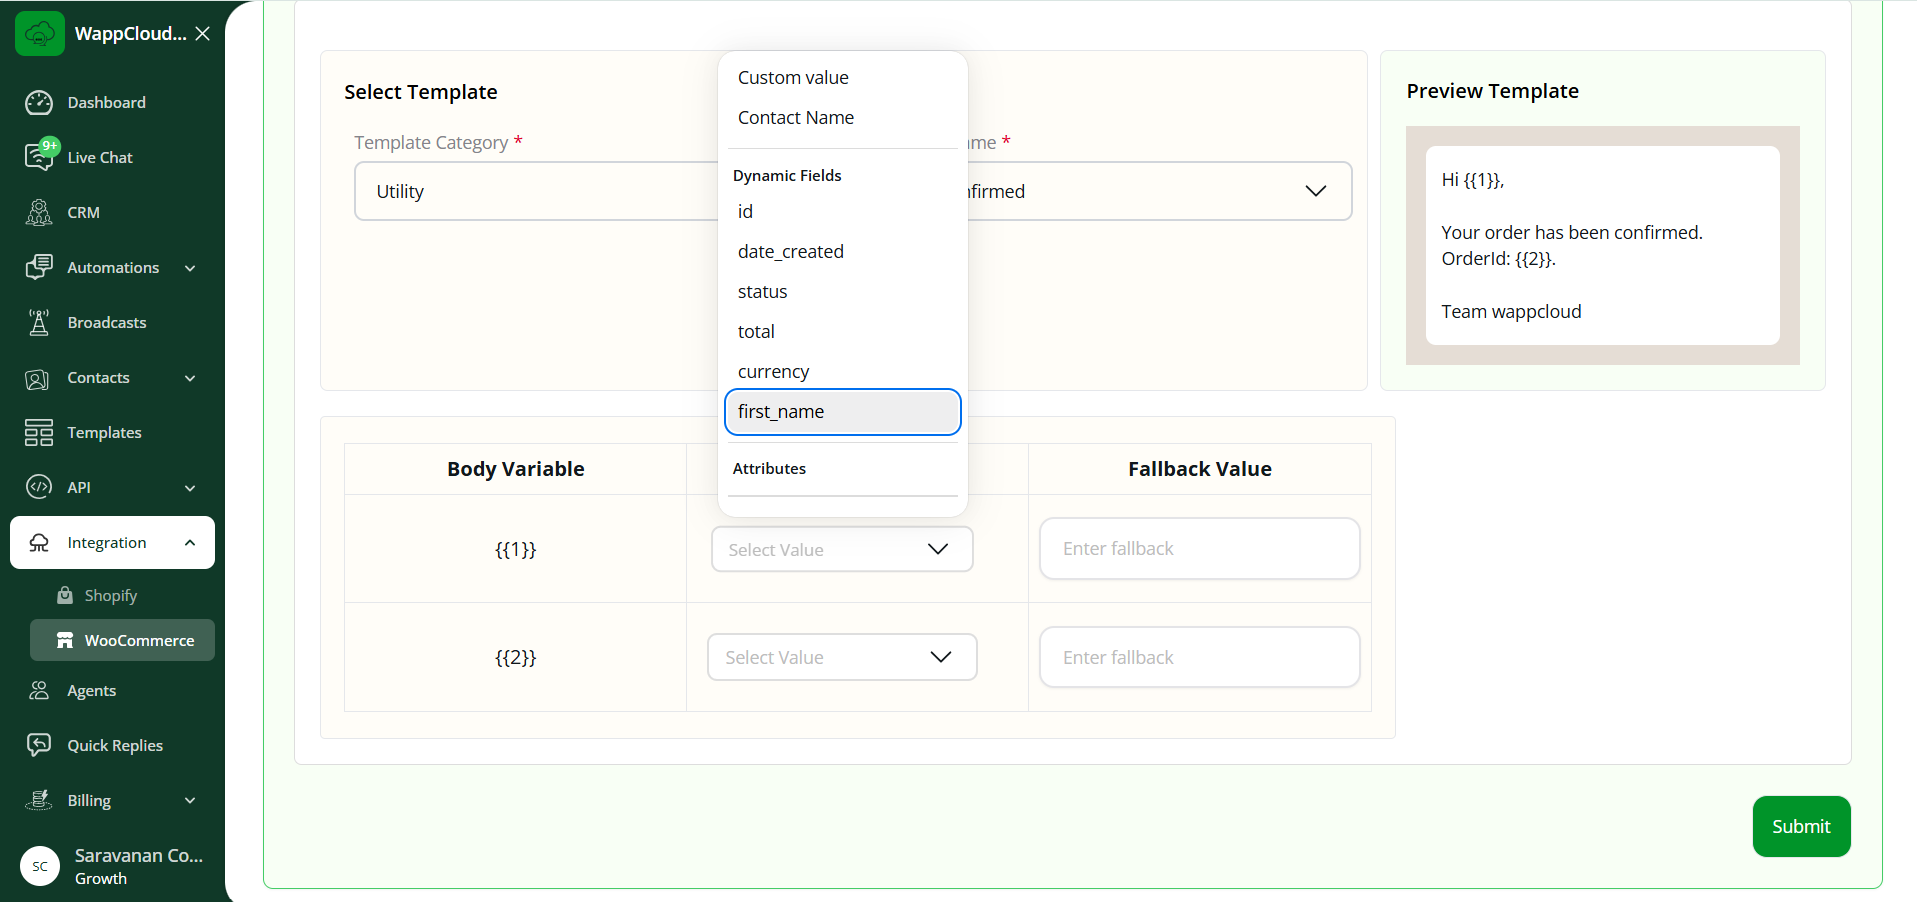
What are “Dynamic Fields”?
Dynamic Fields are the pieces of order information WappCloud fills in automatically for every customer — you set up the mapping once, and it applies to every future order. For example:
Hi {{1}}, your order #{{2}} status is now: {{3}}Here {{1}} could be mapped to the customer’s first_name, {{2}} to id, and {{3}} to status — so each customer automatically receives their own order details without you typing anything per order.
Available options in the dropdown include:
- Custom value – Fixed text you type yourself, same on every message.
- Contact Name – The name saved against the contact in WappCloud.
- Dynamic Fields (from the order):
id– The order ID.date_created– The date the order was placed.status– The current order status (pending, processing, completed, etc.).total– The total order amount.currency– The currency used for the order.first_name– The customer’s first name.
- Attributes – Any custom contact attributes you’ve created in WappCloud (e.g. loyalty tier, city), if you’d like to personalize beyond just order data.
Use the Fallback Value field next to each mapping to define what should be shown if that piece of data is missing on a particular order — this prevents a message from going out with an empty placeholder.
The Preview Template panel shows exactly how the final WhatsApp message will look with sample values before you save.
Step 4: Save and Go Live
Click Submit once all placeholders are mapped. The rule appears in All Notification Configuration, and WappCloud will automatically send this template whenever a WooCommerce order matches the selected topic/event type — going forward, with zero manual effort.
Tip: You can add more than one rule per store to cover different order statuses (e.g. a separate message for Pending vs Completed), and manage/delete existing rules from the Action column.